Complex Shapes
Reading
- Curves (required)
- Basics (required: form section)
- Learning Processing: Chapter 1 + 2 (recommended)
"I am a kind of paranoid in reverse. I suspect people of plotting to make me happy." ~ J. D. Salinger
Shape Modes

Processing has the ability to define custom shapes. Some of the shape types are shown here.
The command to draw a particular shape type is:
beginShape( mode );
For each shape example the following 3 vertices were used:
vertex( 40, 40 );
vertex( 40, 80 );
vertex( 80, 80 );
Of course their y-values have changed for each example but the plotting remains the same.
The command to end a shape is:
endShape( CLOSE );
The use of CLOSE is optional but generally a good idea.
Take a look at how some shapes appear incomplete. For example the LINES shape only draws one line. That is because it expects a pair of points for each line to be drawn. Since there are only 3 points, there is only 1 line. Also note the difference between using POLYGON with CLOSE and without.
There are more shape types available in processing such as:
- beginShape(TRIANGLE_STRIP);
- beginShape(TRIANGLE_FAN);
- beginShape(QUADS);
- beginShape(QUAD_STRIP);
Plotting Verticies

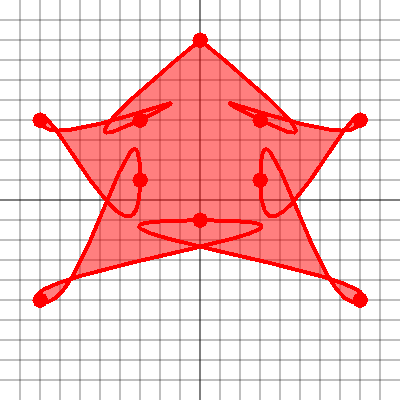
Here is a simple star shape plotted using 10 vertices. It's important to note the symmetrical vertices of a shape since this will simplify the plotting of the shape. Here we have 4 symmetrical vertices on each side of the star. Below we'll see some code for how to draw the star shape.
Curved Vertices

Believe it or not, this is the same star shape plotted with curve vertices. Curve vertices are plotted with an additional control point at the beginning and end of the list of vertices. These control points define how the curve will start and end. The rest of the vertices are plotted normally. There is an option in processing to set the curve tightness. This means that as points are plotted, they are pulled through the point more tightly causing them to twist and bunch like you see in this picture. Usually curve tightness of 1 works quite well for drawing regular shapes, but it should be experimented with to get some interesting results.